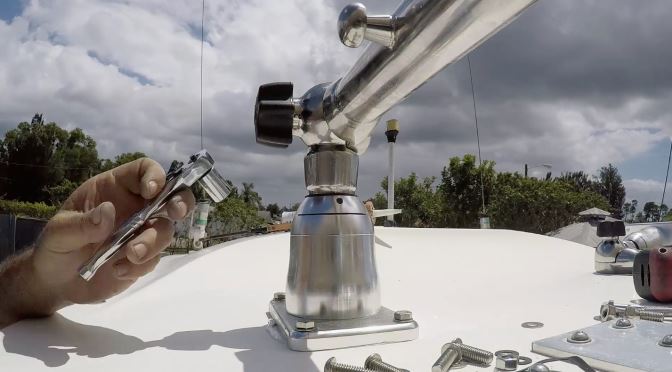
Florida Sportsman Project Dreamboat returns with episode 5, which features the installation of TACO Grand Slam 280 Outrigger Mounts and Aluminum Tele-Outrigger Poles on the hardtop of a Bayliner boat named "Trophy."

The pros at Marine Customs Unlimited [MCU] install new TACO Grand Slam 280 Mounts and Aluminum Tele-Outrigger Poles on this Bayliner named "Trophy."

Steve from MCU opens the box of TACO Grand Slam 280 Mounts, which comes with all the hardware needed for installation. Backing plate sold separately.

The underside of the TACO Grand Slam 280 base.
To install the GS 280s, Steve Altenhoff with Marine Customs Unlimited had to create new holes through the hardtop for the outrigger base and mounting screws. The boat's owner wanted the outrigger mounts installed as far back on the hardtop as possible while also having enough hand clearance to use the outrigger handles. Steve carefully measured the length of the outrigger handle and the hardtop from the outside and backside edges to find the ideal location to install the outrigger mounts.

Before drilling any holes in the hardtop, Steve measured the GS 280 handle and also the outside and backside edges of the hardtop to find the ideal location to install the mounts.

Steve first drilled a hole for each base.
After drilling the main hole for each mount, Steve recommends aligning the outriggers as straight as possible before marking and drilling the mounting screw holes.

Steve positions the mounts as straight as possible before marking and drilling the screw holes.
Steve then removed the base prior to drilling the mounting holes. Once all eight holes were drilled, Steve applies a bead of caulk around the main hole to prevent water from reaching the exposed fiberglass before inserting the mount, attaching a backing plate and tightly securing the screws.

A bead of caulk was applied around the main hole for the GS 280s before inserting and attaching the mount.

Once the mount is inserted through the hardtop, wipe away any excess caulk. Some people add caulk around each screw hole or dip the screws in sealant before securing the mount in place.
Lastly, Steve attached the GS 280 handles, tested the rotation and then began attaching the pair of Aluminum Tele-Outrigger Poles.

Now that the mounts are installed, Steve inserts the Aluminum Tele-Outrigger Poles.

Lastly, Steve riggs each poles with a single line, using our TACO Standard Rigging Kit.

The outrigger mounts and poles are a great addition to Trophy.
Because it's the boat owner's first time using outriggers on Trophy, Steve rigs each pole for a single line using the TACO Standard Rigging Kit. With rigging complete, the boat is now ready for some serious fishing!

The end result.
Watch the exclusive clip below and find full Florida Sportsman Project Dreamboat episodes 1 through 5 at YouTube.com/tacomarine.


Please login first to add comment. Please click here to login.